Learn How To Capture Epic Hyperlapses With Your Drone
Within the past 6 months I have been completely obsessed with capturing hyperlapses with my drone. They are challenging and they take quite a good amount of time to create, but the final result is always worth it!
For those of you unfamiliar, a hyperlapse is basically a moving timelapse that captures photos over a specified duration at a very slow speed. Once you take these photos and combine them into a video, the drone in this case will look like it’s flying at a normal speed but all of the motion in the photo will be moving really fast so it exaggerates the movement in the frame giving you a really awesome effect.
I recently just dropped a full tutorial on creating hyerlapses with your drone (attached to this blog post) but I really quickly wanted to run through some of the more important pieces of my workflow. These are the following steps that I follow to make epic hyperlpases:
Planning
The first thing is to think about your subject, right? One of the most important things that makes a good hyperlapse is movement so think about a scene where there is a lot of action happening that you can capture over a long period of time. I often look for busy roads or a day with clouds rolling through, but the best is trying to find unique spots that offer unique movement.
For example, I was able to capture this shipping port just south of New York City on an active day that made for some of my hyperlpases I’ve created. There is so much going on from crates being moved, to forklifts moving around, to larger machines operating throughout. These are the unique opportunities that can really make for the best results - but don’t get me wrong, I still love capturing a good city skyline with traffic wizzing by on the highway.
So subject matter is really important because if you decided to do a hyperlapse of an open field… the results wouldn’t be as good. You’d be better off just taking video at that point because if there is no motion, then there really isn’t a point in capturing a hyperlapse of it.
Now, there are just a few settings that we need to change in order to make sure we get the best results - one in particular is the saving of the raw photographs that your drone captures, so under original you want to make sure this is set to raw. You can also set your output to be 4K so that you have the highest resolution preview. This is the hyperlapse that the software automatically creates for you - but we aren’t going to use that because we will get the best results by making our own with those raw photographs.
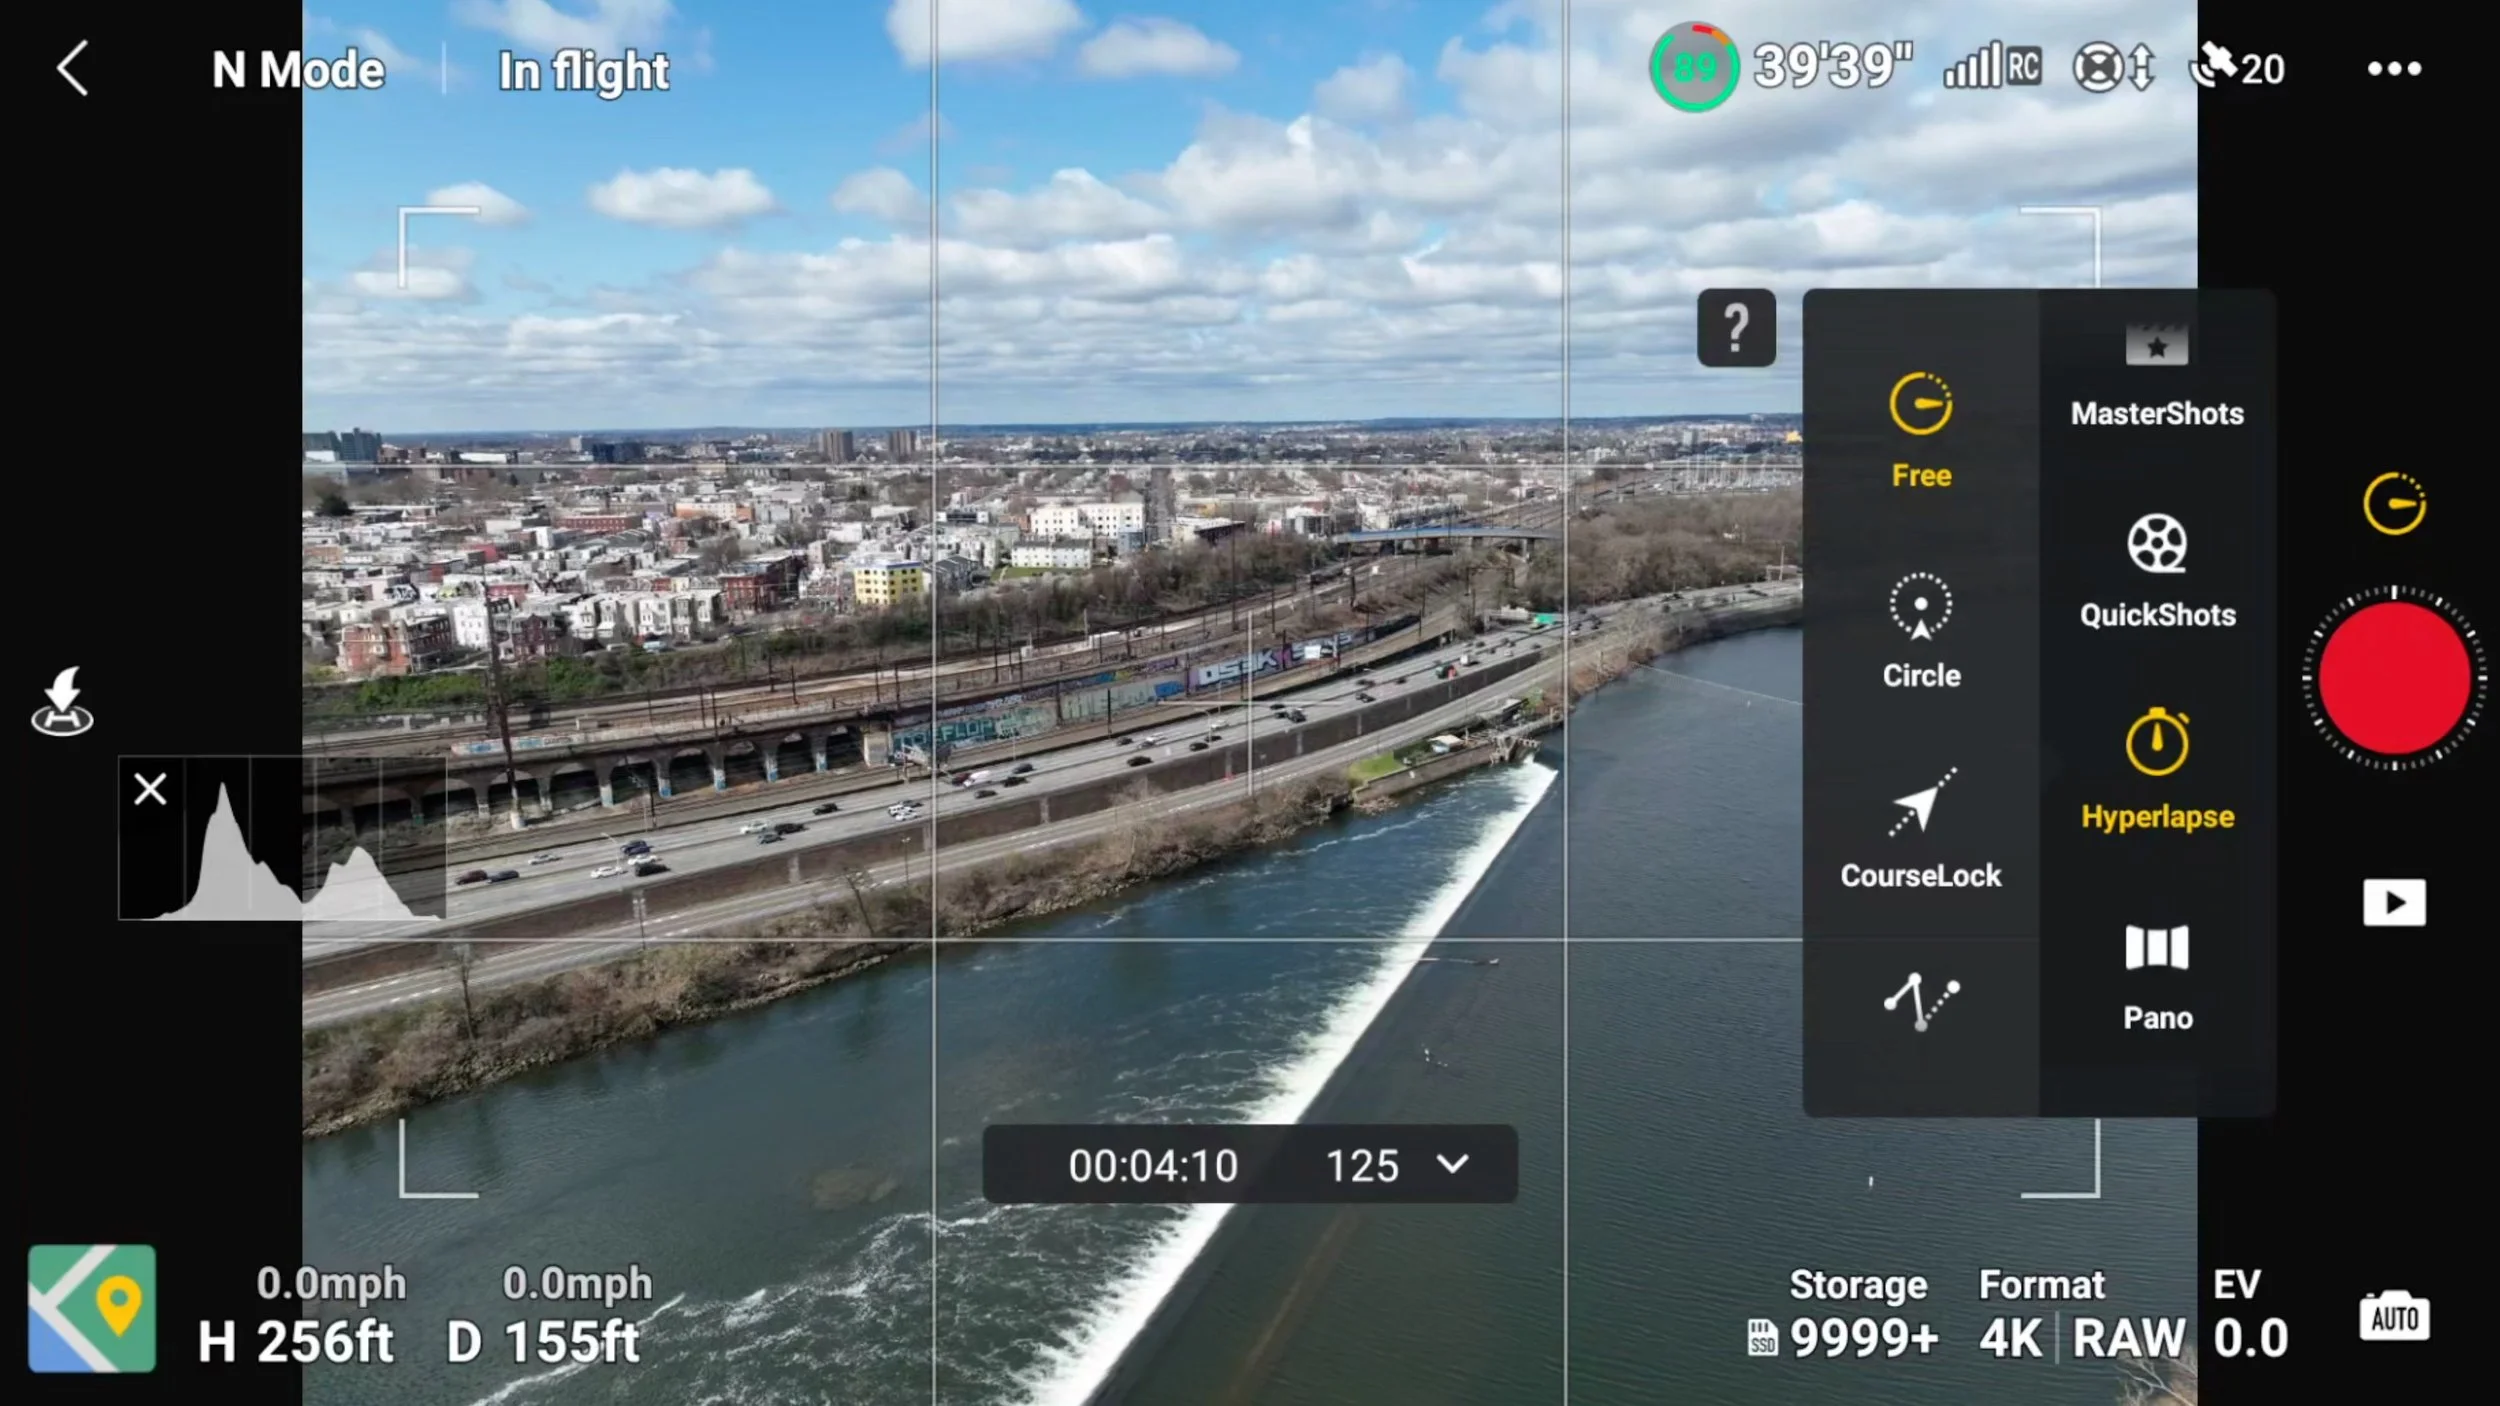
Mission Set Up
Now it’s time to plan our mission with the 4 different options that DJI has built in. We have free, circle, course lock, and waypoints. Each of these flight modes allows you to program the drone to fly in a different way to get creative with how you capture your hyperlapse. For a complete analysis on how to use these flight modes, check out the full tutorial video that I have linked to this blog post!
Flight
Now that our mission is set up, it’s time to go over a few tips and best practices to follow during the actual flight of the drone. Because the flight is usually automated, I figured this would be a good time to share some tips and tricks from a shooting and flying standpoint to get the best hyperlapse possible.
The first thing I want to mention is that if your drone comes disconnected, it will immediately stop your hyperlpase and begin returning to home. As you can imagine, this is annoying because you can’t just pick your hyperlapse up from where you left off, you have to completely restart all over again. I’ve gotten burned by this so many times so making sure that your remote is properly facing the drone to avoid even the slightest break up in signal is going to save you a lot of time.
The next tip probably doesn’t need to be said, but you want to make sure you are starting off with a full battery. I like to capture long hyperlapses and then chose my favorite section of that flight to actually use, so typically I am getting about 1 hyperlapse per battery.
Now you might be wondering what drone is best to use for capturing a hyperlapse. There are plenty of compatible options that have the hyperlapse mode available, but there are only 2 that I personally use on a daily basis and they are the DJI Mavic 3 Cine and the DJI Mini 3 Pro. These are the best in my opinion because their flight time is crazy long, like, over 40 minutes of flight out of one battery. This is enough to fully set up a waypoint flight mode and then execute that flight all on one battery. Each of these drones have their own benefits as well, for example, the Mavic 3 Cine version can capture hyperlapses at a 1 second interval compared to all of the other drones that have a minimum of 2 seconds. This allows you to capture photos faster for a different feel to your hyperlapse.
The Mini 3 Pro on the other hand has a camera that rotates vertically to capture vertical hyperlapses natively. As I mentioned, I share a lot of these hyperlapses through Instagram which is a platform that caters to vertical video, so if I can natively shoot in that aspect ratio, it makes my workflow a lot more streamlined. I still do a lot of vertical hyperlapses with my Mavic 3 that doesn’t have a camera that rotates vertically - we’ll get more into that when I get into the editing portion of this video.
The final tip that I’ll share is to be vigilant for “erratic” flight. Sometimes the drone will mess up on its flight, it might lose your subject, the wind might push it around, sometimes I have noticed that the drone flies faster than I told it to… so if you can catch something like this early, you might be able to restart and capture that same hyperlapse on the same battery or you can at least land early, swap batteries, and not waste time letting the drone finish a hyperlpase that isn’t going to come out the way you intended.
File Management
Managing and organizing the images you capture can always be a challenge, and this is no exception when capturing hyperlapses. You’ll be left with hundreds of raw photographs and as we get into the photo and video editing, you’ll only have more files to categorize. Below is a screenshot of my file management structure when dealing with a hyperlapse. I separate all of the raw DNG photos, all of the JPG photos, and the videos live loosely within my project folder.
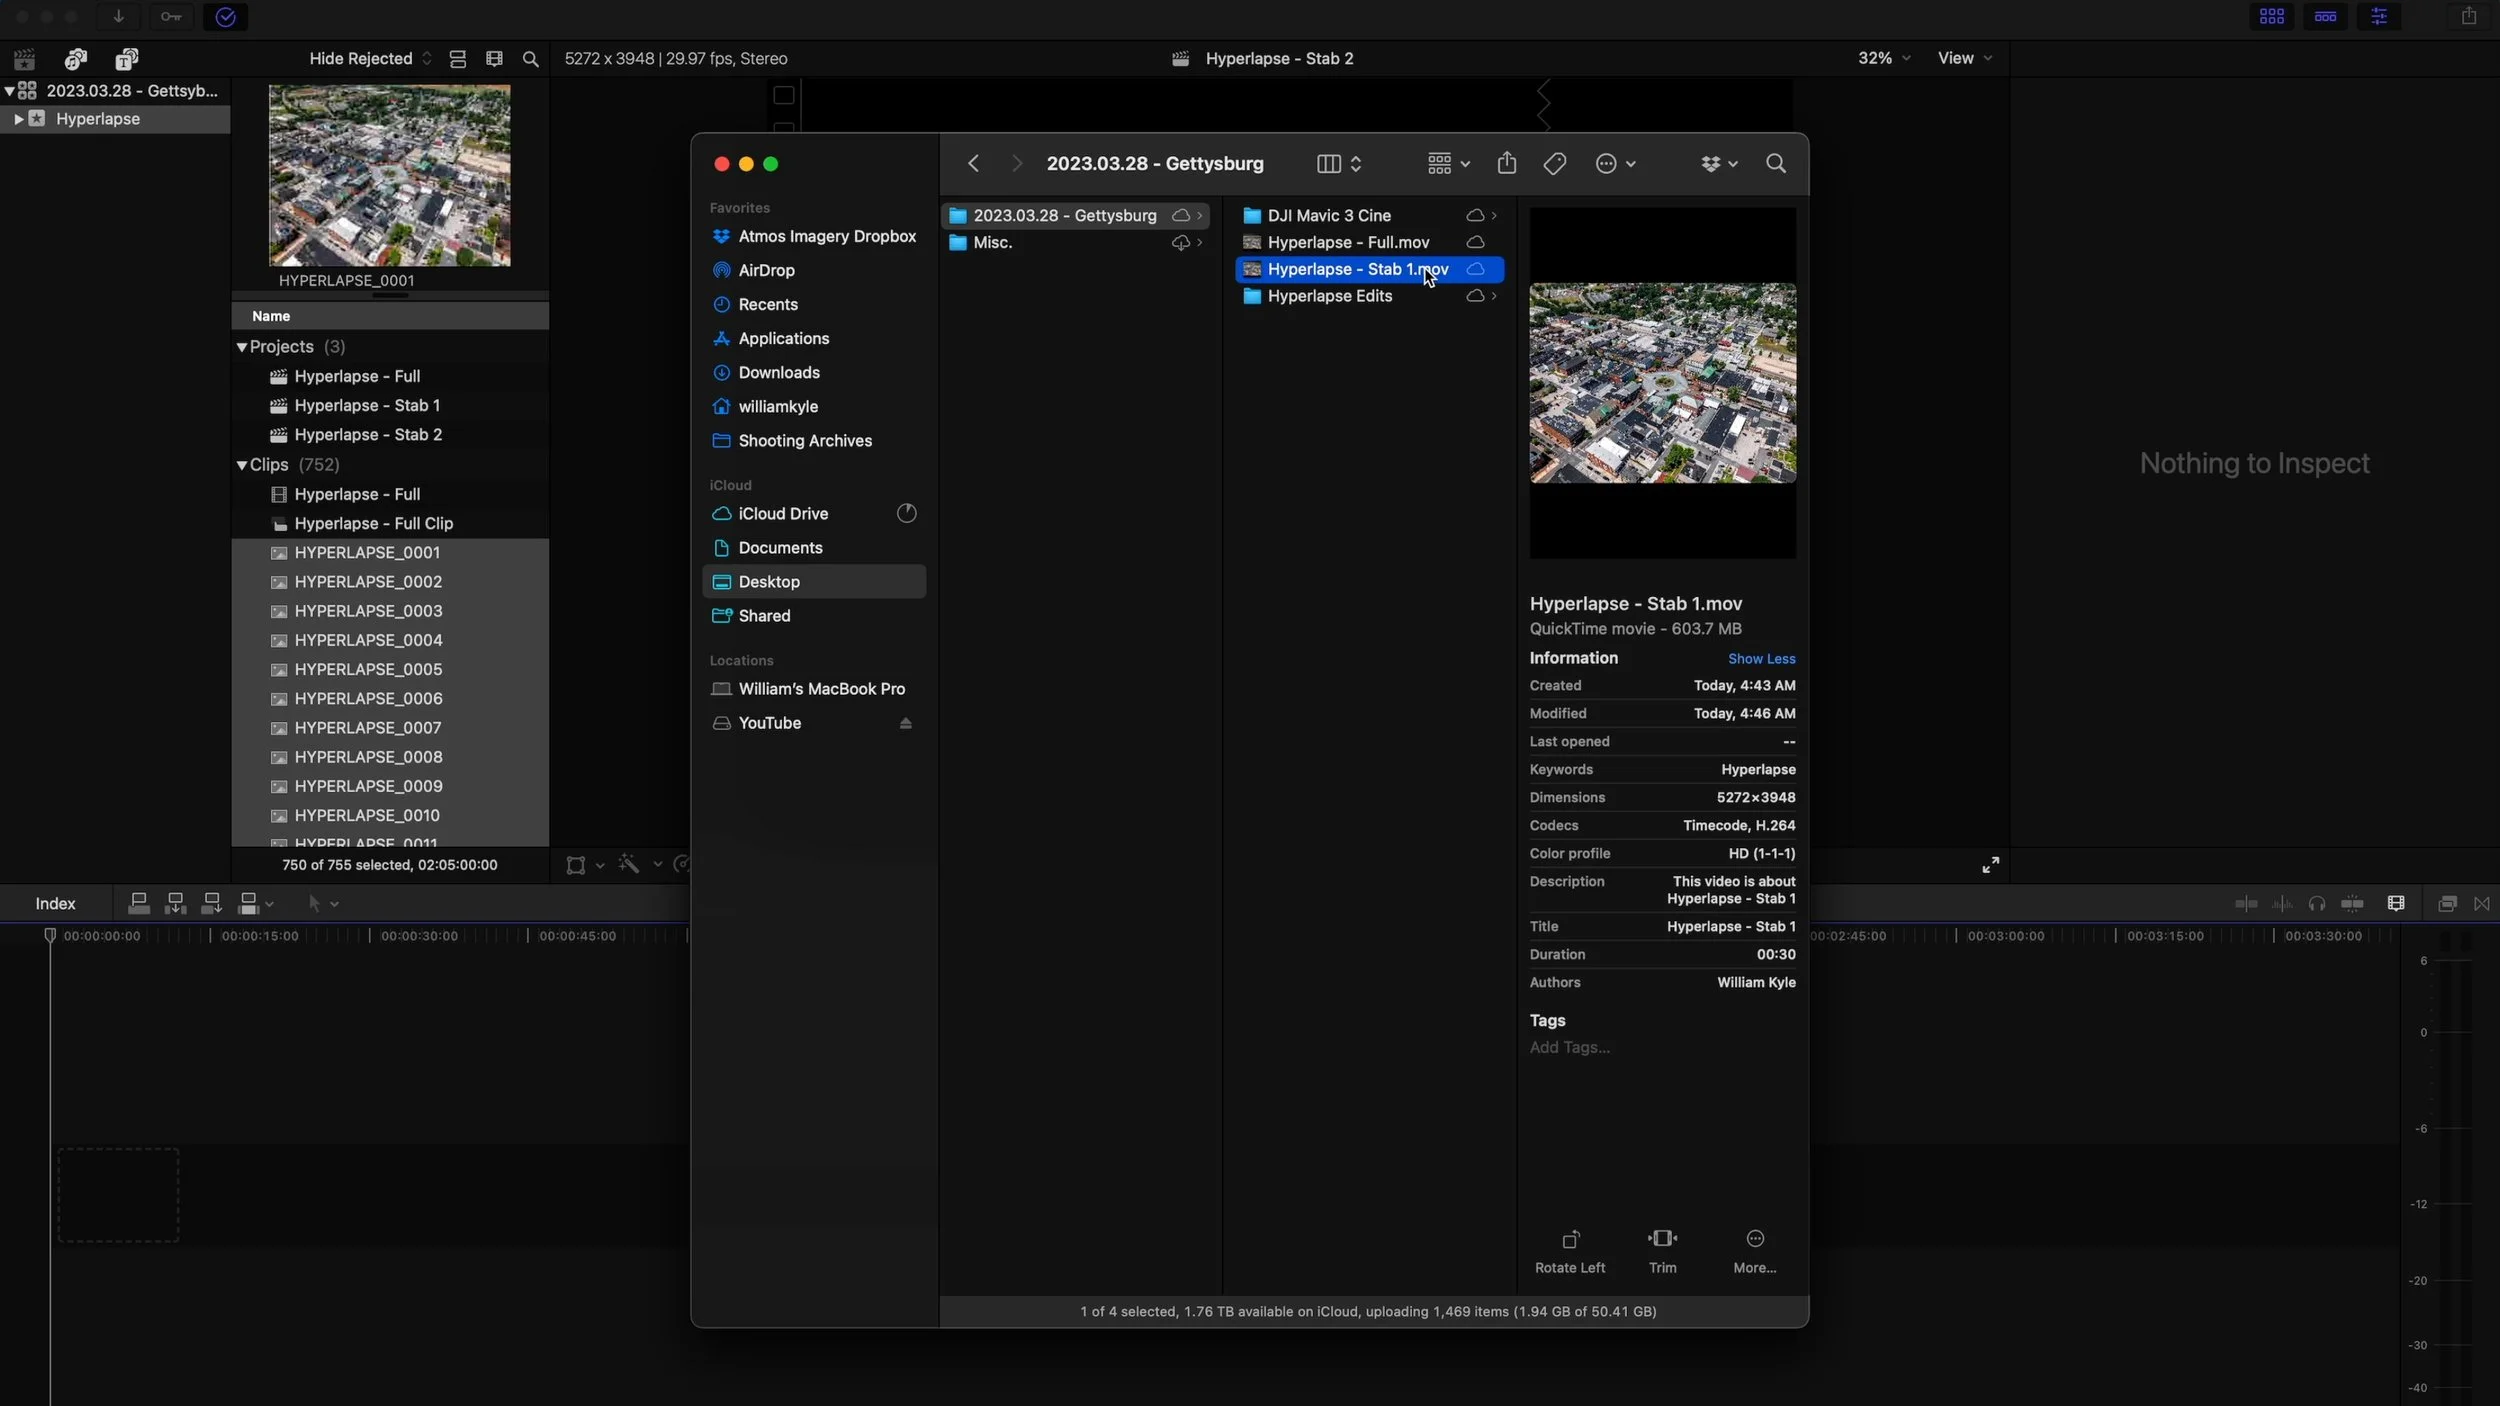
Photo Editing
The photo editing portion is pretty self explanatory - just edit your photos like you normally would, but make sure you are using an editing software that can batch process photos! This way - you can edit 1 of the photographs and paste those edits to the rest of the images in your set.

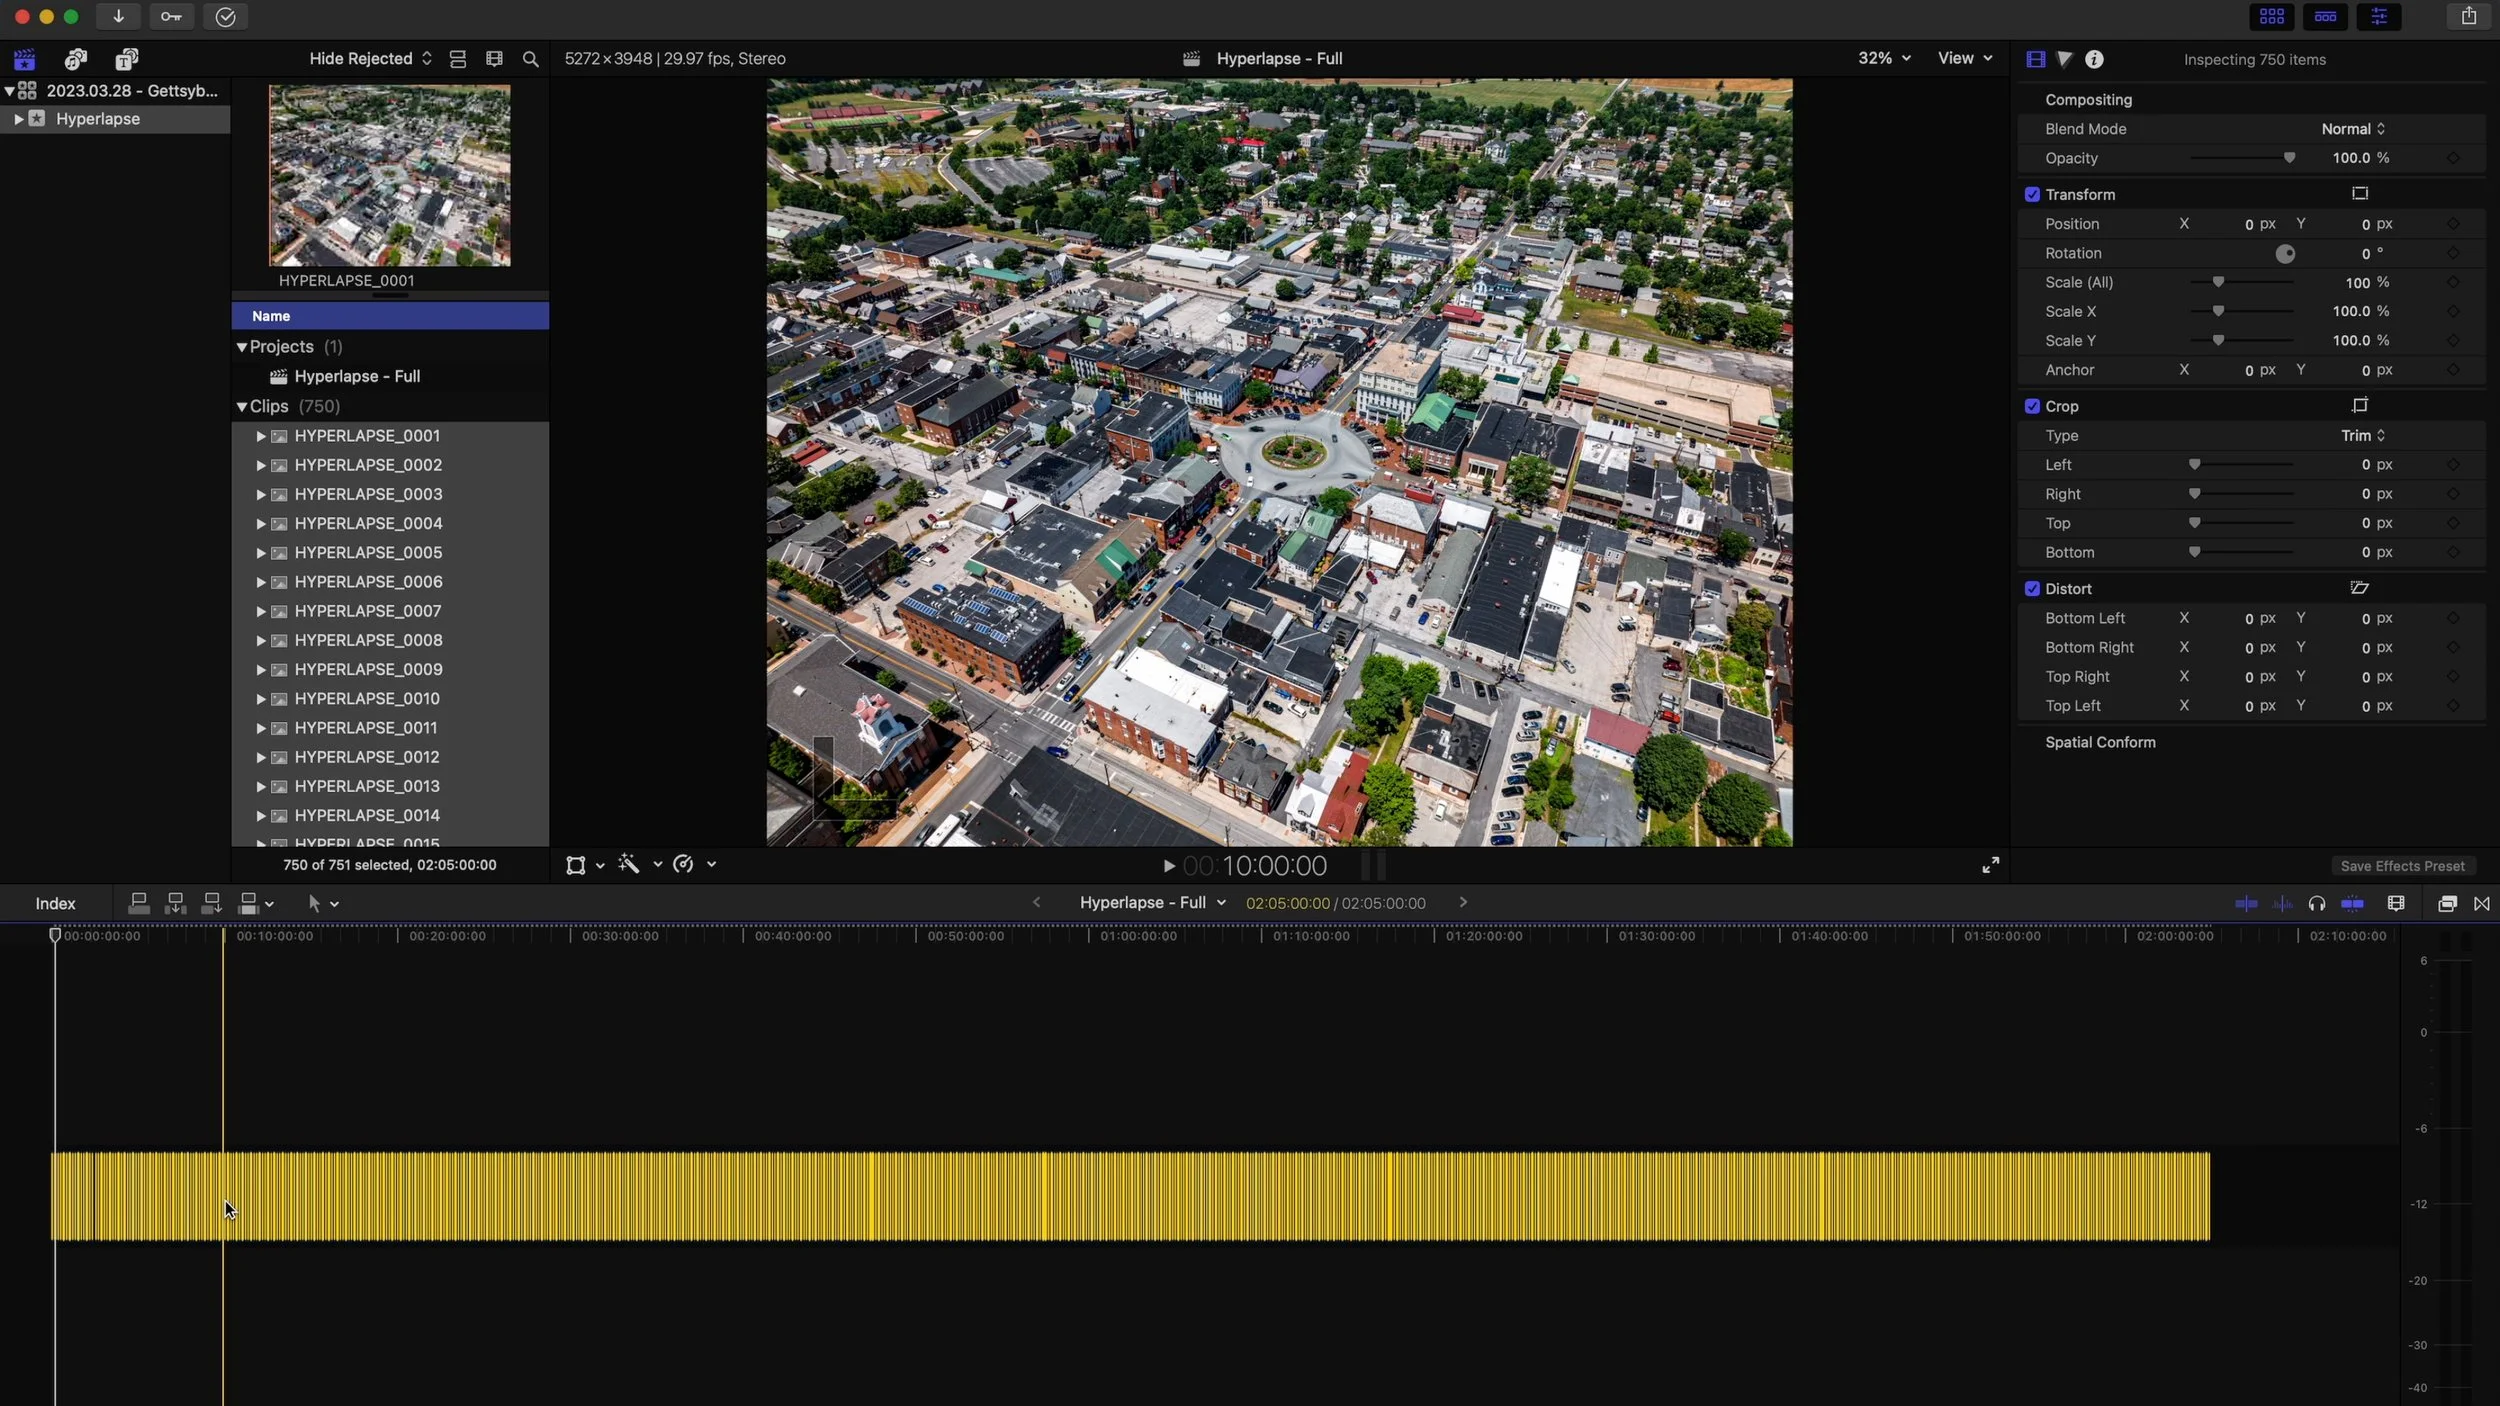
Video Editing
Now getting into how we actually piece together the video. This takes a lot of moving of files around, multiple exports, and of course an acumen for keeping all of your different video files organized. For a better understanding of my workflow, make sure you watch my full tutorial video that is included on this blog post!
Conclusion
Getting into a good workflow when capturing hyperlapses is so important. There are a lot of steps, but following these steps should help you get the best possible results. Make sure you check out the full tutorial video to get a better understanding of my workflow from start to finish!